March
1, 2008
First
thing I did was to flush out the boiler with my garden hose.
This was a very good suggestion from Tony Btaten in the UK.
He has already had his boiler up to steam and said his regulator
was stuck in open throttle due to metal filings getting stuck
in the regulator valve.
1 Hour
March 2
Brad Buetlich, from California, and myself have been assembling
our boilers at pretty much the same time and we have found different
problems and have our solutions here. One of the first things
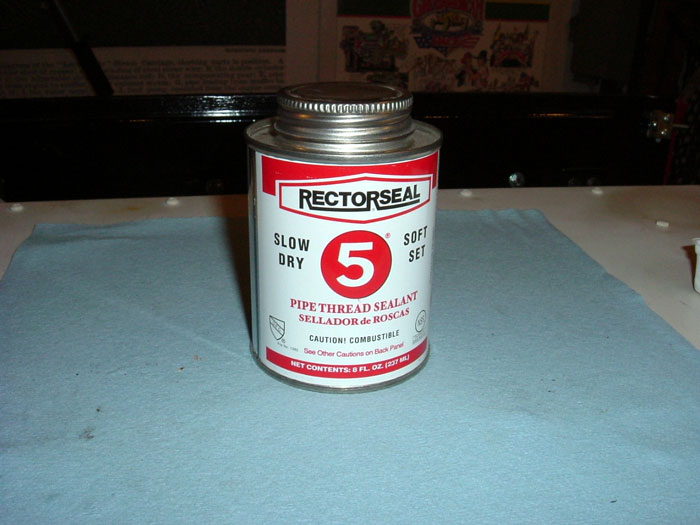
you need to know is to use a high temperature/ pressure thread
sealant on all the fittings and threads. The Teflon paste apparently
will break down and emulsify where ever there is steam, causing
leaks. NOT GOOD! After consulting with some steam guru's we
ended up using a product called Rector Seal 5, available at
your local plumbing store. This sealant is good to 400 degrees
F, 2600 psi steam, and 12,000 psi water. GOOD.
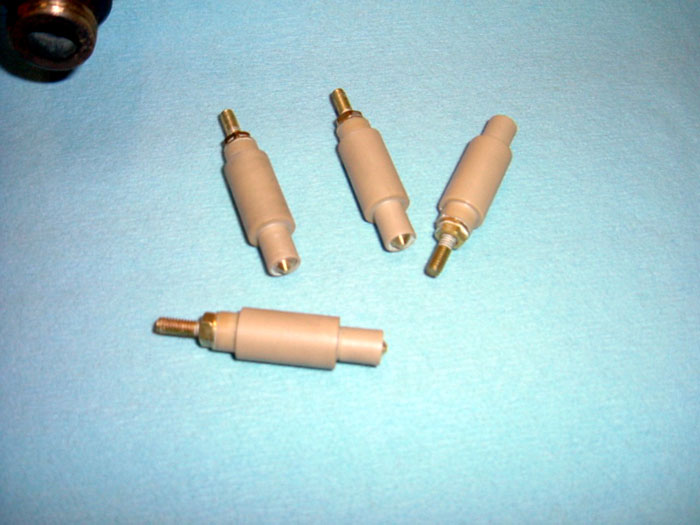
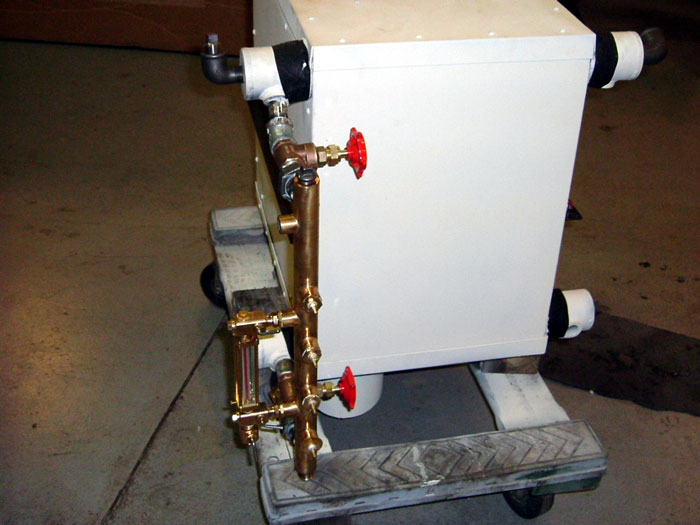
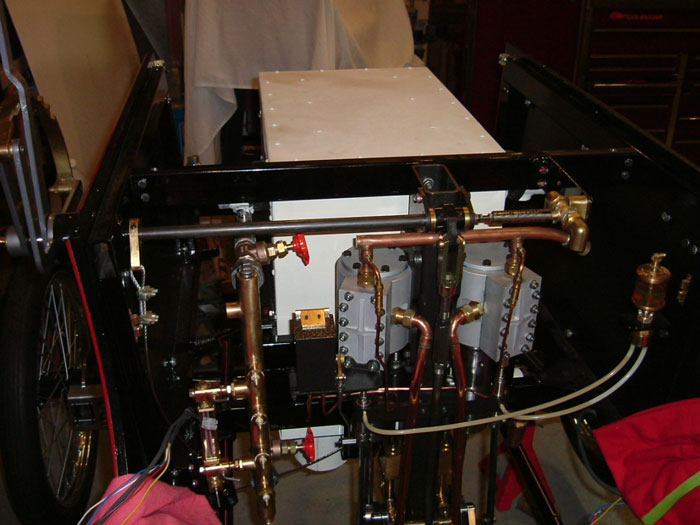
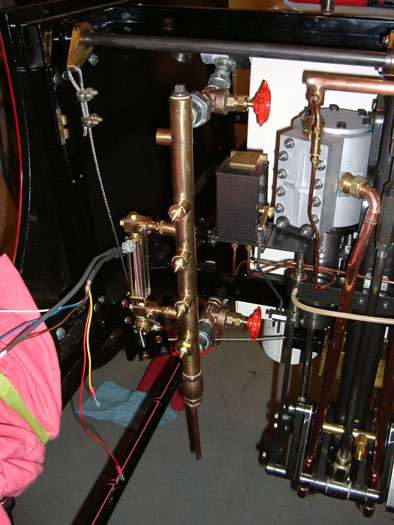
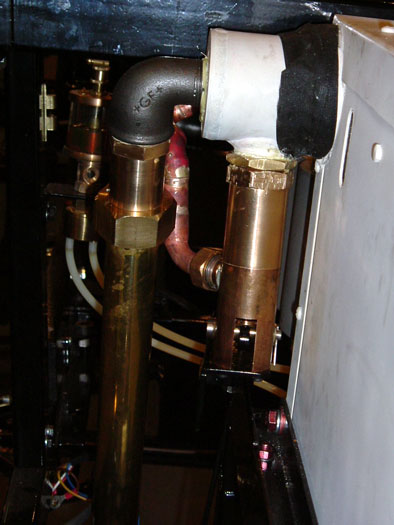
Install the new water/ steam sensors in the manifold using the
sealant, I also used a drop of oil on the o-rings to help them
fall into place and seat properly. I then installed the fittings
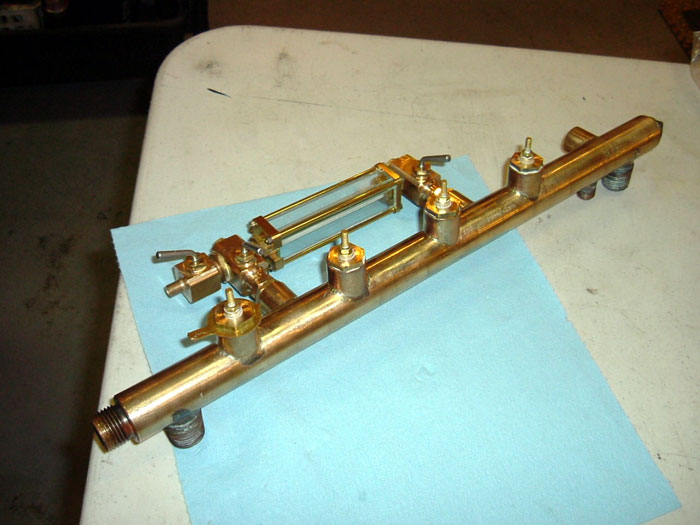
and valves onto the boiler as per the instructions. My manifold
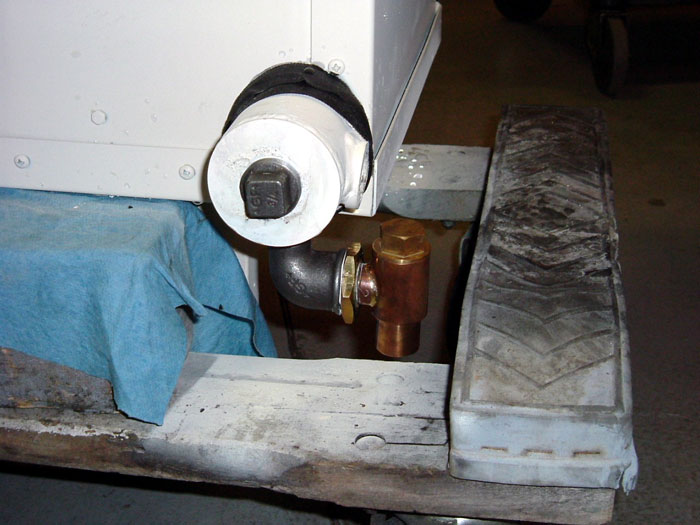
and union joints were off by almost ½ inch. To solve
this problem; go to the plumbing store and get a 45degree elbow
and several threaded nipples. I removed the 45 degree street
elbow from the upper boiler manifold and using a 2 ½
long nipple, the 45 degree elbow, and a 1" nipple, then
the gate valve and union, I was able to make the unions mate
at the same height. There are several pictures to emphasis this
correction. I also installed the 2 water check valves on the
lower boiler manifold at this time. It is recommended that you
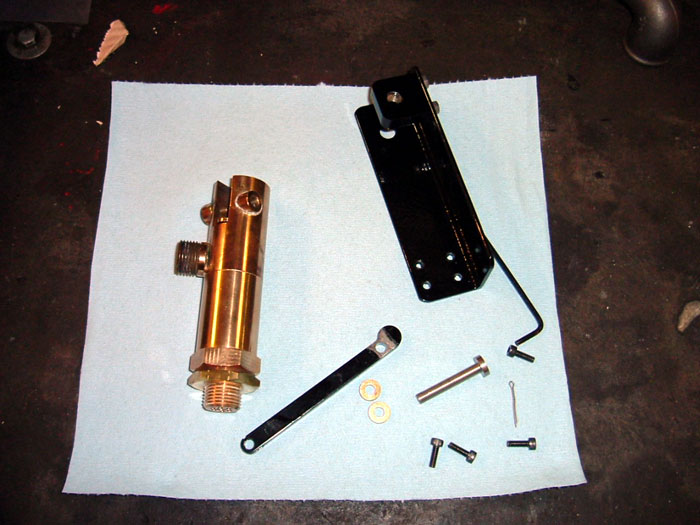
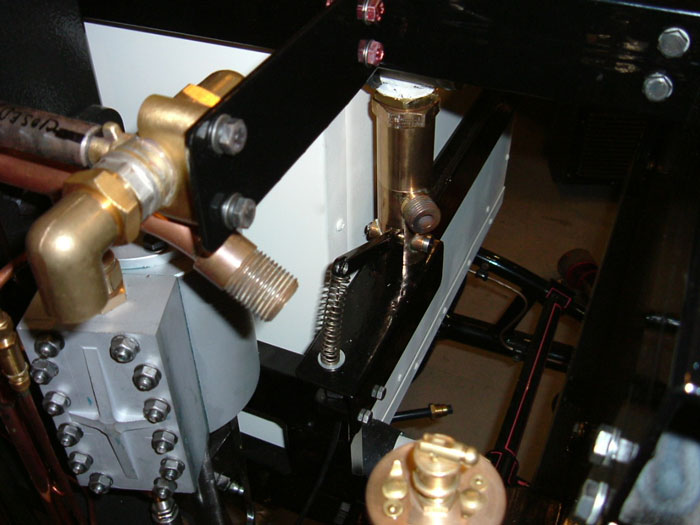
install the throttle regulator now due to the fact that it is
much easier to get to the small allen bolts now than when the
boiler is in the chassis. See ISO final 1
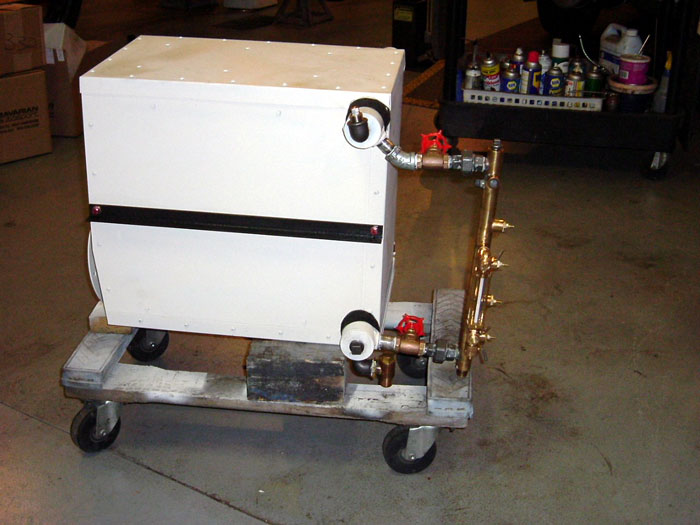
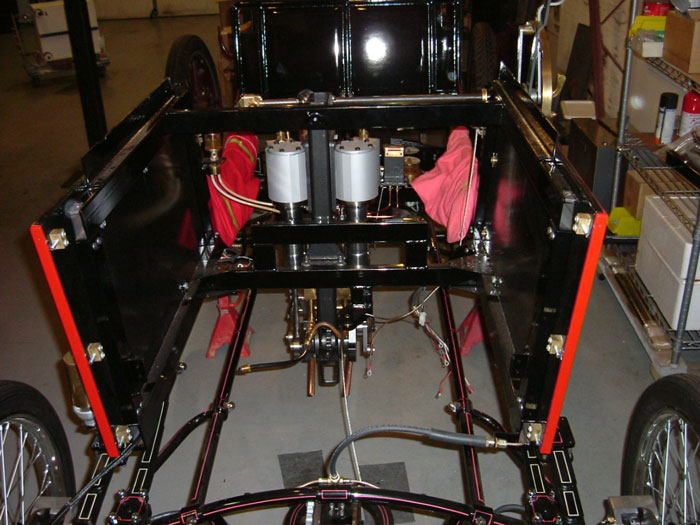
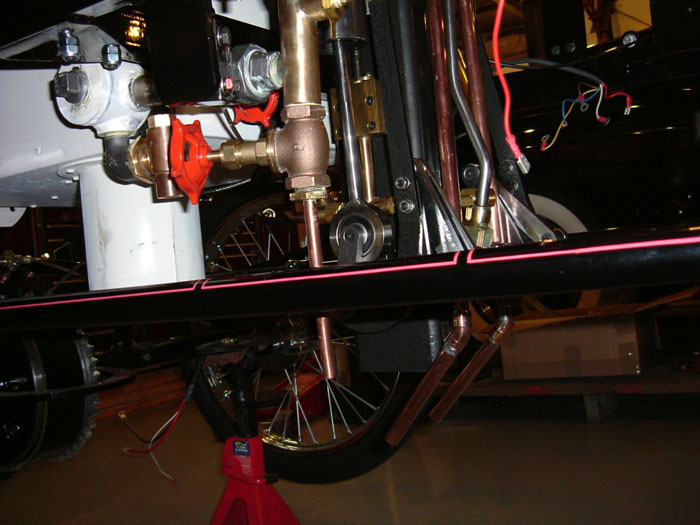
I prepped the chassis for the boiler installation: Remove both
water tanks, remove the rear brake flex line (you will need
to install a 90degree elbow later, due to the fact that the
brake line hits the burner flange), and remove both the water
tank support brackets and the rear chassis frame piece. Loosely
install the water tank supports to the appropriate sides of
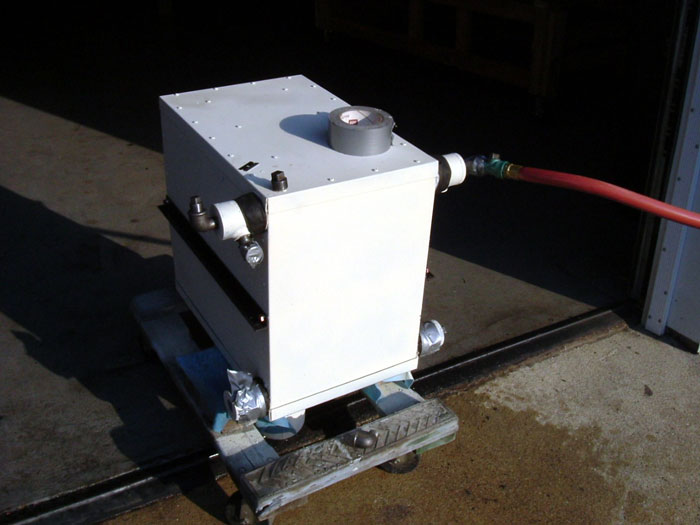
the boiler. Remove the manifold at the unions on the boiler.
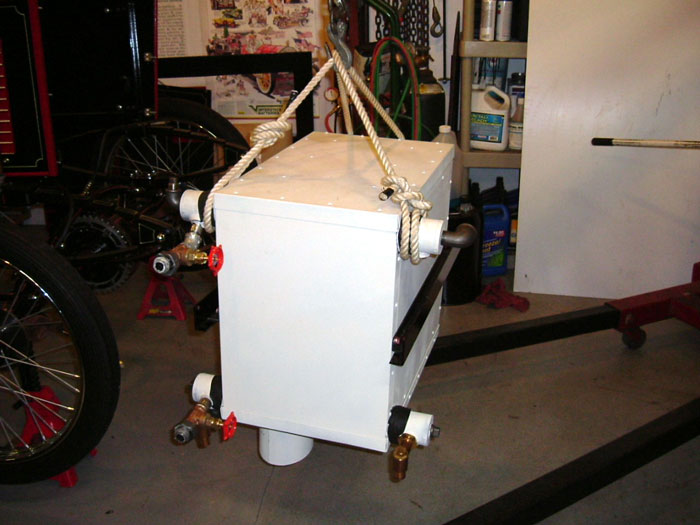
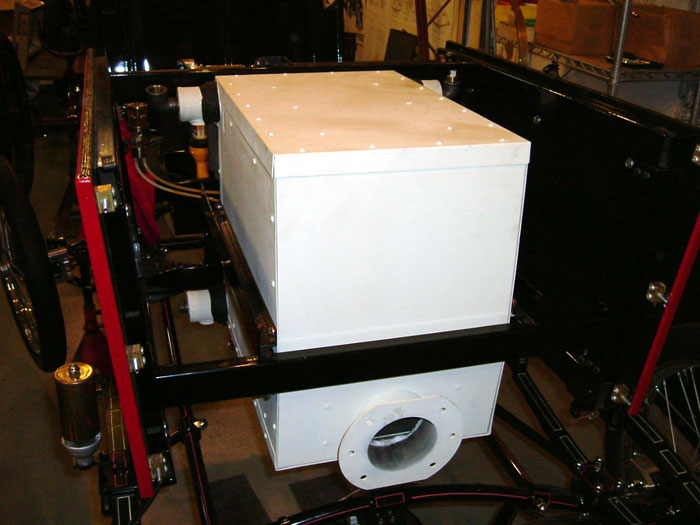
I used and engine lift and rope sling to install the boiler
into place, refit the rear chassis frame and let the boiler
rest into position, align all the holes and secure all the bolts.
4 Hours
March
7
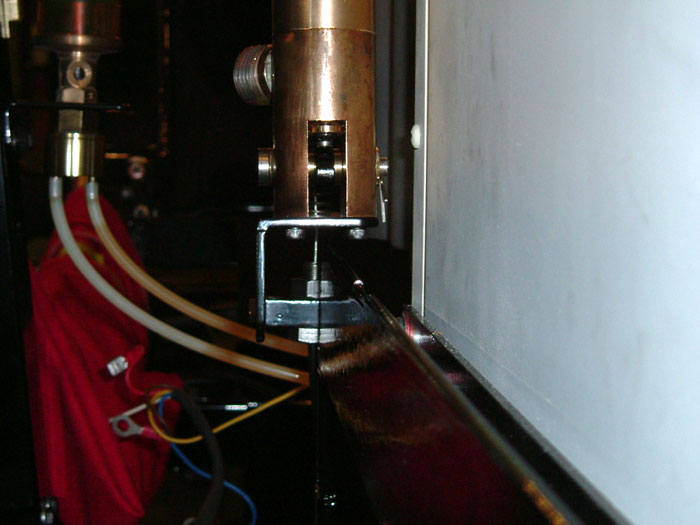
If you forgot to install the regulator, like I did, then just
support the boiler from underneath and remove the L/S water
tank rail. This will give you enough room to access the 4 allen
bolts from the bottom of the regulator. I had to notch my water
tank rail about ¼ " in order to clear the throttle
cable adjuster bracket. Install the throttle cable/ components.
I put a small washer under the spring, as the spring kept cocking
in the hole when I pulled the cable to actuate the regulator.
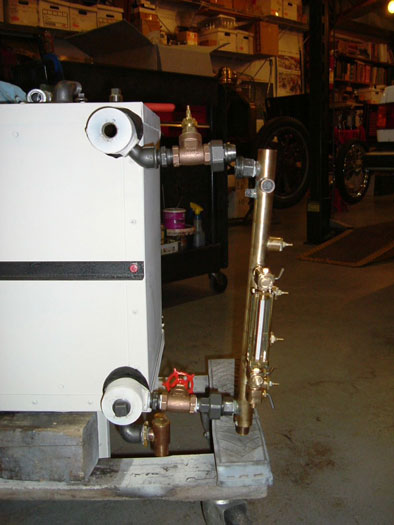
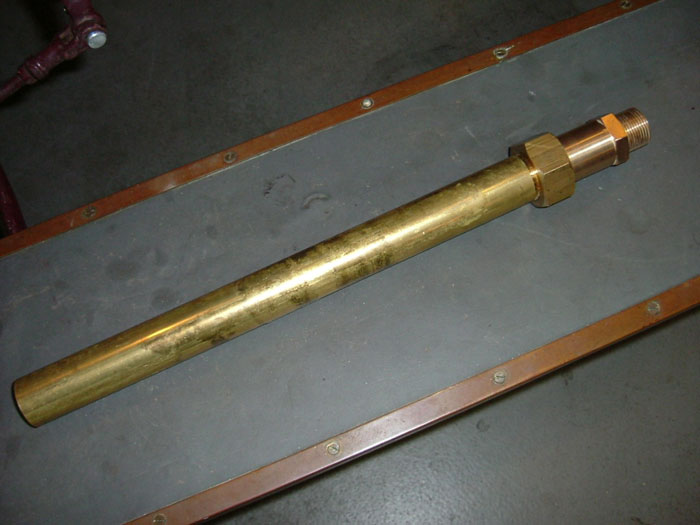
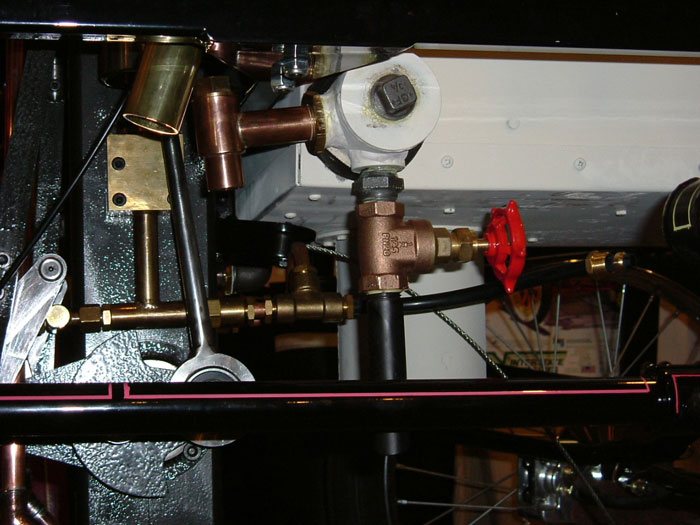
I built the safety valve assembly, since it will be adjusted
at a later time I only ran the adjustment sleeve to flush with
the bottom of the valve. I had to hone the brass body so the
valve moved smoothly in the bore. I then installed the safety
valve assembly to the boiler manifold and then installed the
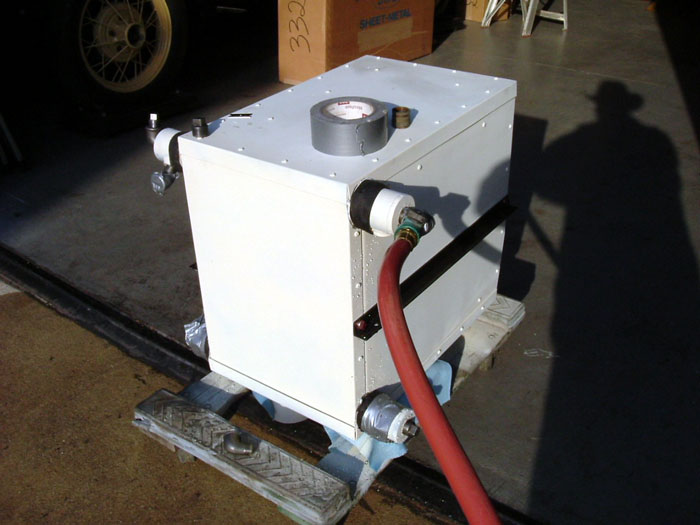
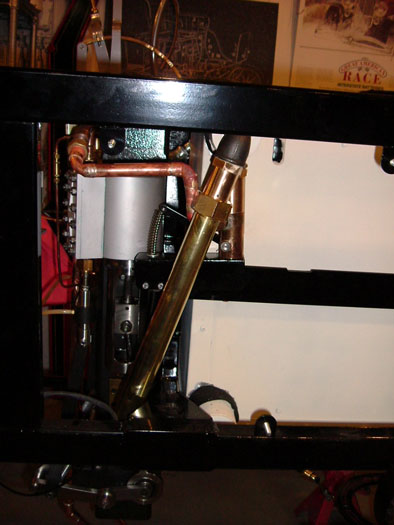
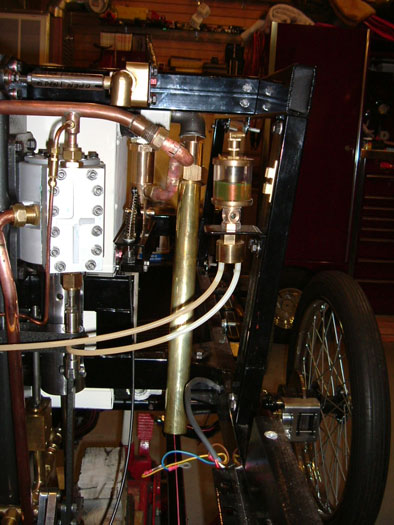
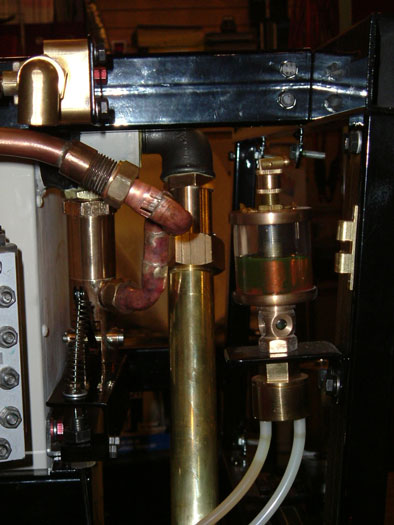
temporary super heater bypass tube. You will notice that with
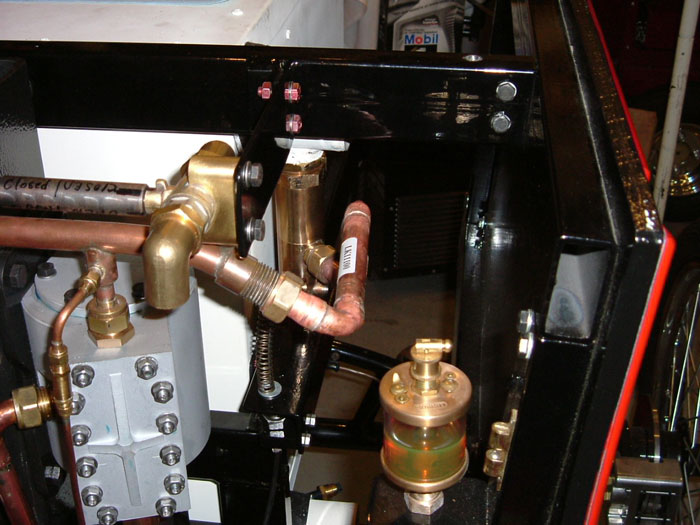
all this plumbing, it's starting to get crowded. Install the
drain valve to the bottom boiler manifold; make sure you don't
leave the handle hanging over the chassis bar.
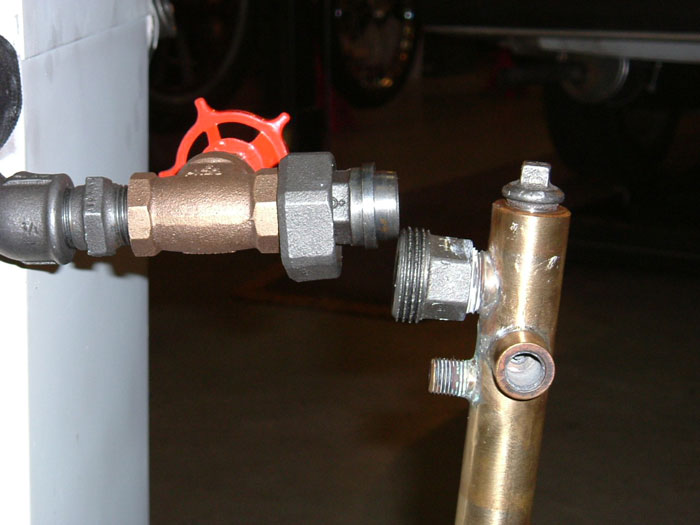
I reinstalled the manifold to the unions and installed the gate
valve to the bottom of the manifold, again not over the chassis
bar. Make sure to seal and tighten the 2 clean out plugs. I'm
going to be running a steam whistle, so I purchased a ball valve
with lever handle and installed this onto the R/S upper manifold
with the supplied 90 degree street elbow. This is the valve
with the yellow handle in the pictures.
3 Hours
The chassis is starting to get quite crowded and space is becoming
a premium with still the fuel lines to be run
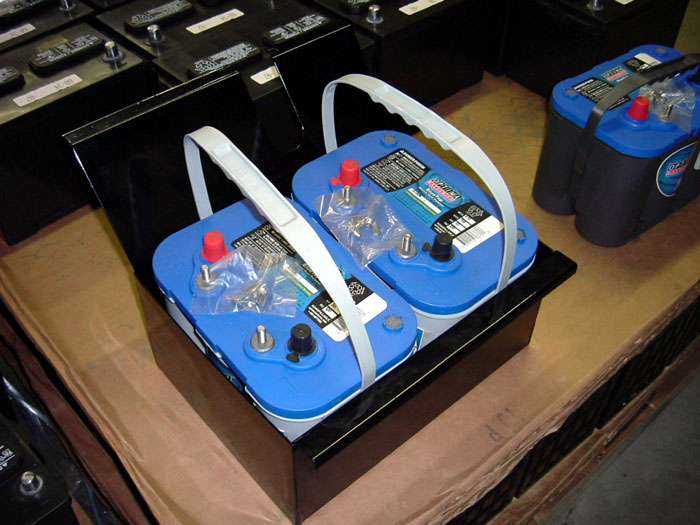
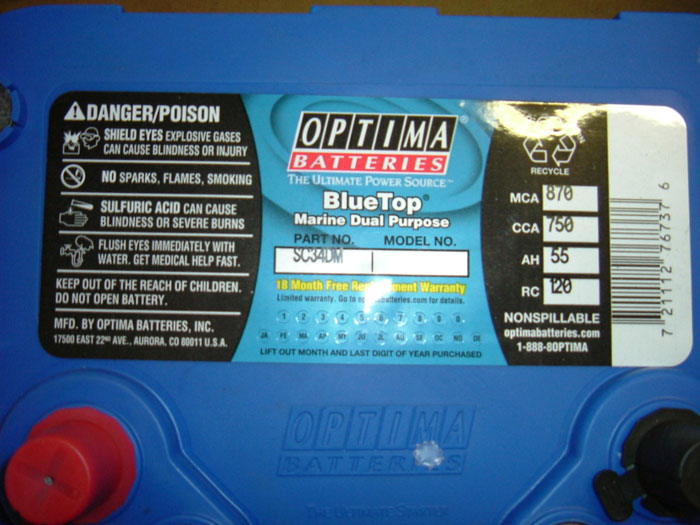
Regarding the batteries, I've done the research with Interstate
Batteries, and have found that the Optima Battery SC34DM will
fill the bill nicely. It is a Deep Cycle Marine, sealed battery,
(no acid mess or fumes) rated at 55Amp Hours, Reserve Capacity
of 120. Reserve capacity is the important number, this means
that the battery can run for 120 minutes with a constant 25amp
draw. Also; 2 batteries will fit snugly in our battery box with
just enough clearance for the floor. They list for $210. Each.
For more battery information: www.optimabatteries.com
There's definitely light at the end of the tunnel and it's getting
exciting again.
My next installment will be the burner/ fuel related installation.
Happy
Building
Rick
Click
pictures to enlarge
Likamobile
Home •
Kits One and Two
•
Kits
Three and Four •
Kits
Four-B and Five
•
Caliper Correction
Kits
Six and Eight •
Kit
Seven •
Kit
Eight •
Kit
Nine •
Kit
Ten •
Kit
Ten Addendum •
Kit Eleven
Kit
Twelve •
Kit
Thirteen •
Kit Fourteen •
Kit Fifteen •
Year End •
Kit Sixteen •
Leaf Spring Modification
Kits
Seventeen / Eighteen •
Engine
Modification •
Boiler
Installation •
Burner
Installation
Fuel
Line, Brake & Throttle Pedal Installation •
Final Kit •
Final Assembly & Steam
Up
Road Test & Modifications
• Purge
Modification