September 2,
2006
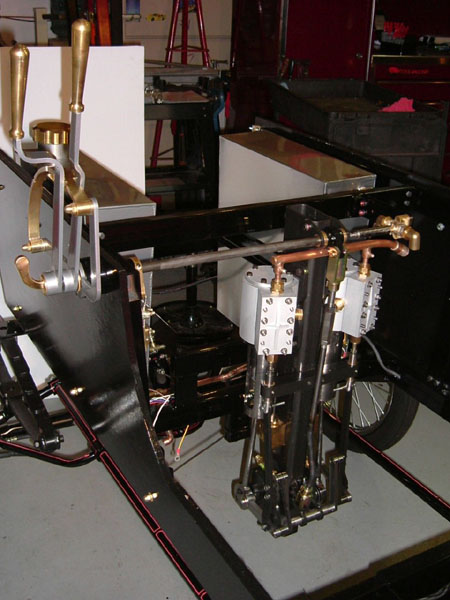
The correct piston rods arrive. I dismantled my valve train
and piston/crosshead assembly. Reread kit 10 assembly instructions
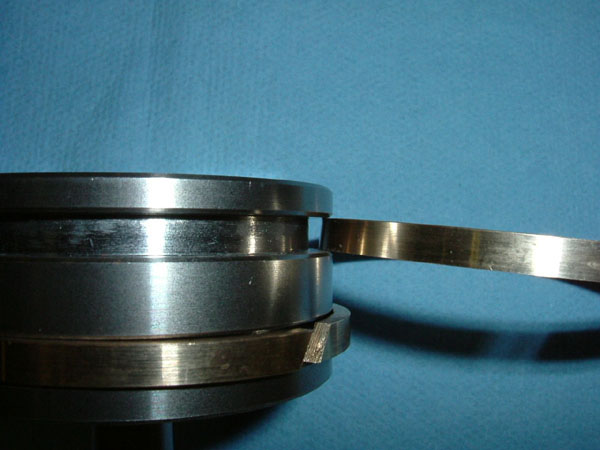
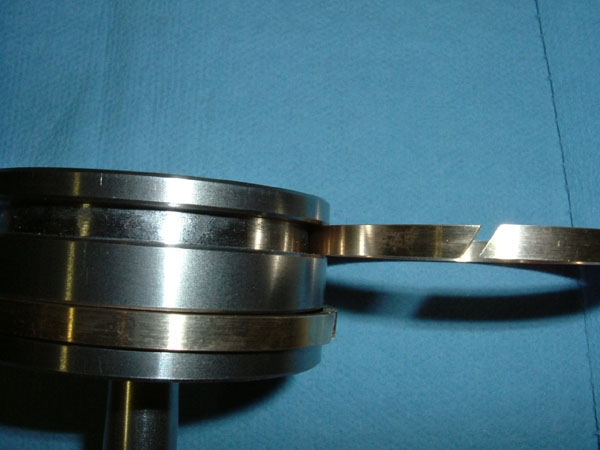
and start assembly again for real. Fit piston rings to the pistons;
make sure the rings will roll into the grooves with out any
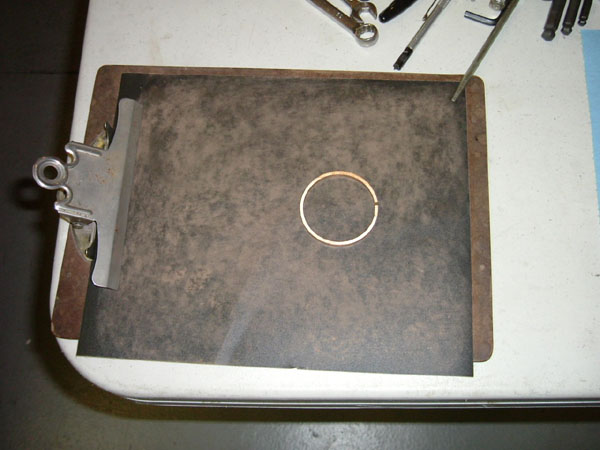
binding. I had to use 600 grit sand paper on a clip board (flat
surface) and narrow the width of the rings, sand in a figure
8 pattern so as to keep the ring surface even all around, remove
material on both sides just enough for the rings to roll around
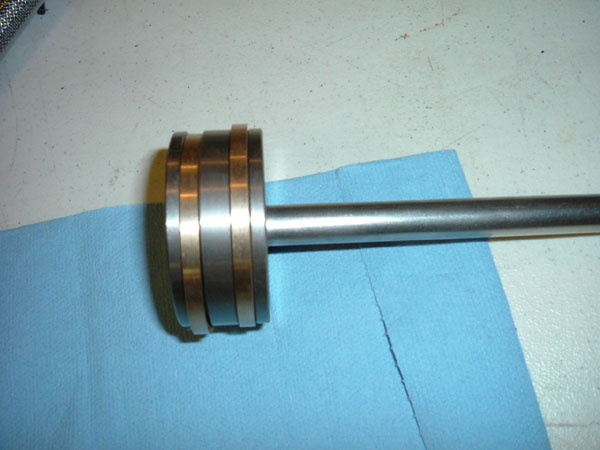
the piston groove with out binding. Clean both ring and piston
and install on piston. The rings should compress easily without
binding. Note: if the rings bind they won't seat inside the
cylinder properly. Rotate the ring splits at 180 degrees from
each other. Install the piston/crosshead assemblies as described
in Kit 10- Part 5, using the Hylomar on the cylinder cover and
Loctite the bolts. Hylomar is a Permatex product available through
your NAPA dealer, part # 765-2682.
2.5
Hours
September
4
Dismantle the steam chests and apply Hylomar on the cylinder
surface only and secure with the flat washers and nuts, leave
the cover off, this is to seal the chest to the cylinder.
Covers will be permanently installed after valve timing
and adjustment.
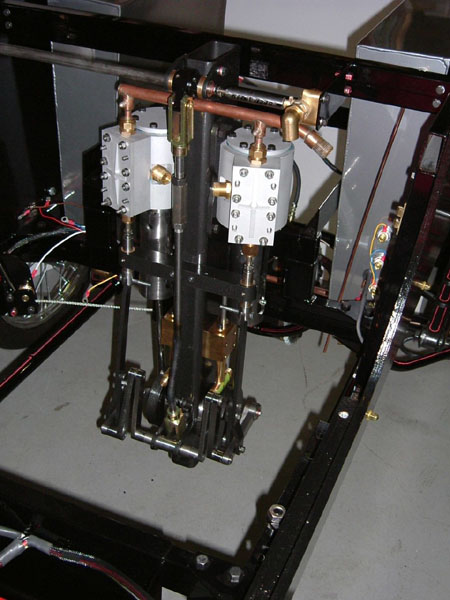
Install connecting rods and adjust crosshead/ piston clearance
as explained in Part 6. Loctite crosshead grub screw after double
checking clearances.
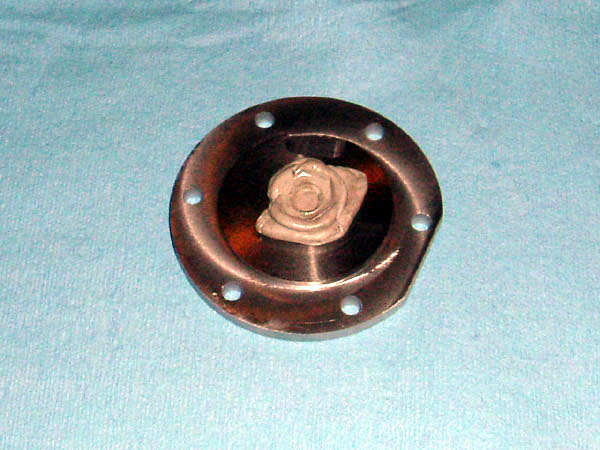
I went one step further with checking clearances. I performed
a cylinder head to piston clearance check (as the piston rod
did protrude slightly further than the piston top). With the
piston at top dead center put a small ball of clay on the center
of the piston and installed the cylinder cap, remove the cap
and measure the thickness of the clay, I had about 1.5mm - 2mm.
If the piston hits the cap, remeasure the piston as described
in Part 6. If correct than you will have to remove the rod material
on the very top so clearance is achieved.
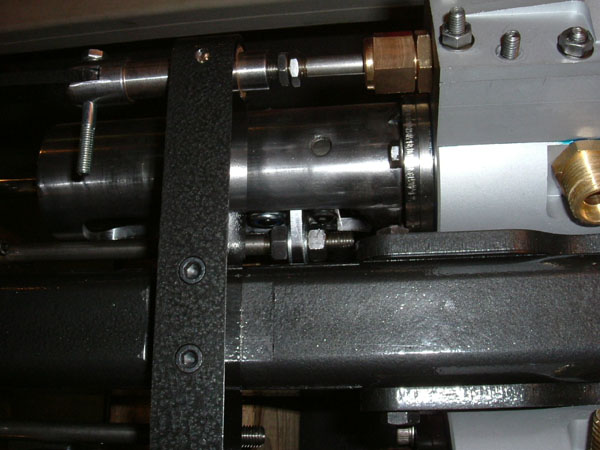
Install the water pumps and adjust as described in Part 7. The
flat washers were not included in the kit, these are 3/8 flats,
I just went to the parts house so I could continue the build.
Tightening the pump rod nuts is not easy, be patient, a regular
wrench will not fit, improvise, I ended up using a long nose
vise grip and a stub nose grip and was able to tighten the top
nut by 1/8 turn at a time. I did put a drop of Loctite on the
threads before running up the nuts. I shortened the short end
of a 5mm Allen key to fit the cap screws holding on the rod
bracket to the crosshead.
2.0
Hours
September
5
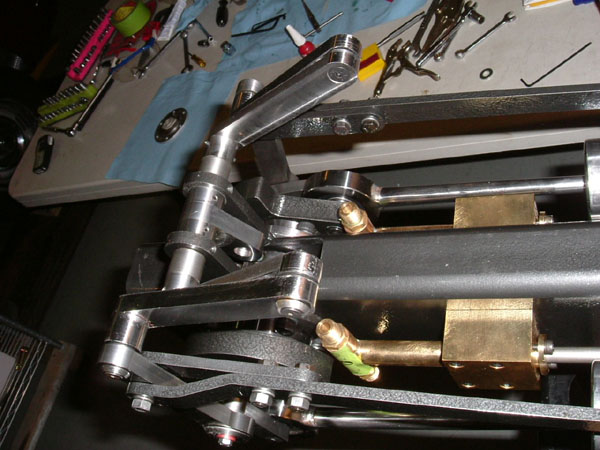
Assemble the valve gear with the new reversing arms as described
in Part 8. Make sure to oil all the needle bearings. I'm still
missing the counter sunk bolts to retain the LK0942 rod, so
I used 2 M5x80x20 bolts with the flat washer for the time being.
After all the valve gear is assembled and looks correct I Loctited
the retaining screws.
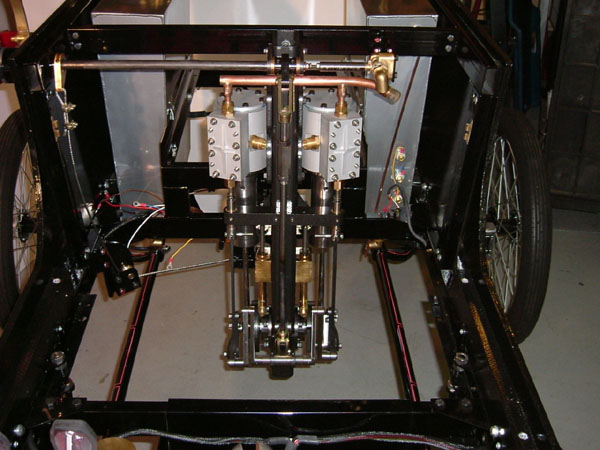
Install the motor mounts and engine into the chassis, the motor
mounts will require a little persuasion but will flex enough
to slide through the mounting holes.
4.0
Hours
The piston rods did not come with Kit12 as promised, once ModelWorks
realized this oversight, they sent out the new rods. The new
reversing arms were included. There were several pieces of hardware
that were missing, but ModelWorks has sent the missing pieces.
The engine went together as described and the fit and quality
is outstanding.
Happy
Building,
Rick
Click
pictures to enlarge
Likamobile
Home • Kits
One and Two •
Kits
Three and Four • Kits
Four-B and Five •
Caliper Correction
Kits Six and Eight •
Kit
Seven • Kit
Eight • Kit
Nine •
Kit
Ten • Kit
Ten Addendum • Kit Eleven
Kit Twelve •
Kit
Thirteen • Kit Fourteen
• Kit Fifteen •
Year End • Kit
Sixteen • Leaf
Spring Modification
Kits Seventeen / Eighteen
• Engine
Modification • Boiler
Installation • Burner
Installation
Fuel Line, Brake &
Throttle Pedal Installation • Final
Kit • Final Assembly
& Steam Up
Road Test & Modifications
• Purge Modification