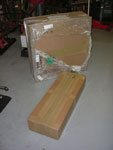
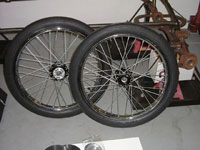
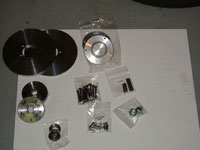
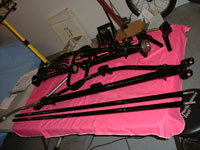
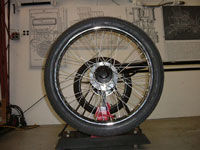
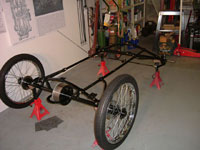
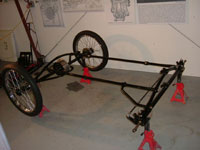
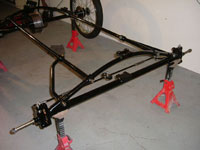
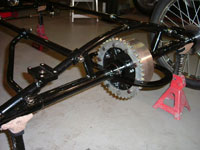
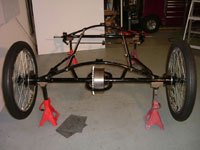
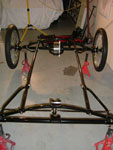
Kits 3&4 arrived on August 18,2005. Opened boxes
and check for damage, check parts against the parts inventory,
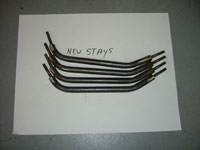
no damage and all parts accounted for. Also the new stays were
packaged with kit #4. See kit 1 notes, stays too short causing
a chassis bow.
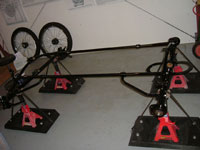
Installed the new stays and the chassis is much better, thank
you Modelworks.
3.0 hours
August
22, 24, 2005
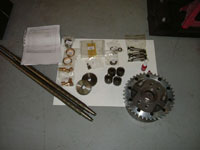
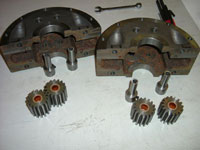
Now for kit 3 the differential assembly. I layed out
all the parts to become familiar with them and as to how the
assembly was to go together. Read the directions carefully,
several times, so you can picture the assembly in your head
before you assemble.
You will have to wash out the differential halves very thoroughly,
mine was filled with machine fillings and chips, cleanliness
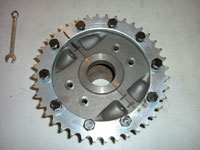
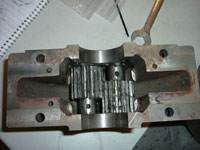
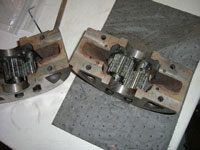
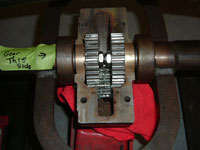
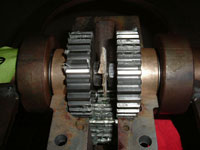
must be stressed for this assembly. Assemble the bushings to
the spur gears and arbors to the cases like in picture #4, but
reverse the second half so the spur gears are staggered. Use
a little oil and a light grease for this assembly.
I'm going to jump ahead here just for a moment due to the fact
that I discovered that the differential will leak, I added 6
ounces of 600 wt. gear oil to my differential when it was completed
and the oil leaked from the case seams as well as the arbor
thru bolts. I chose 600 wt because this differential is identical
to the original and with straight cut gears this heavy oil would
be a requirement. I am going to recommend some sealants to prevent
this problem. The machining of the parts is absolutely right
on and Modelworks should be proud but oil finds a way to not
stay where its put.
Back to the differential, all we want to do at this point is
to figure out the amount of shims we need for the axles as explained
in the instructions. So do not Locktite anything at this point.
Leave the cog wheel off to side for now, you did mark the left
side of the rear axle with some masking tape and note: COG WHEEL
THIS SIDE. I always make masking tape notes when I'm going to
put something together more than once.
Don't fit the keys to the large side gears at this point, save
this part for final assembly. It makes the assembly /disassembly
a lot easier. Assemble the axles as described, just a drop of
oil on the bearings for now, it makes things easier. Now slide
on the outer axle bearings and hold the bearing in place with
some masking tape, this will allow the axle to be straight,
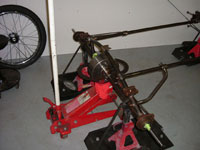
spur gear perpendicular, better measurement in the end. Place
the lower half of the differential onto the spur gears and brass
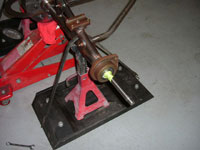
bearing, I used a floor jack as my third hand as this will allow
me to position the differential as it seats on the brass bearing
and the spur gears. Pull the axles outboard so as to seat the
inner bearings, I wedged a piece of cardboard between the two
axle ends so as to help keep the axles always forced out board,
push the outer axle bearings into their seats and tape in place.
Try to center the differential in the housing as best as possible,
put the other half onto the lower half aligning the pins, it
may take a little moving of the axle, but it will seat right
on, due to incredible machine work. Bolt the two halves together,
I modified a 6mm Allen wrench in order to tighten these bolts.
Now move the differential housing to see how much play you have
as asked in the instructions.
In the end I had to use 2 shims each side to have a zero movement.
It took me 3 times to figure the shim requirement.
I dismantled the differential and axle assemblies, keeping the
left side parts and right side parts separate.
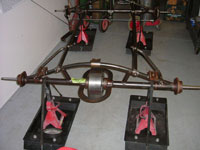
At this point I totally dismantled the entire chassis in order
to send the parts out for powder coating. I used an outfit by
me called Auto Body Contours, Preston and his brother did a
great job and were quite enthusiastic about the steamer project.
8.0 hours
September
2, 2005
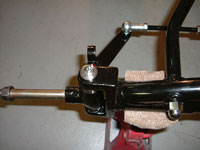
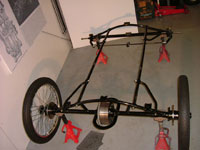
I picked up my parts from the powder coater, gloss black, how
sweet it is. Reassembled the chassis for the final time. Using
grease on the king pins, all the nylock nuts , etc.
2.0 hours
September
5, 2005
Now for the final assembly of the differential and axles. PLACE
THE COG GEAR OVER THE LEFT AXLE HOUSING. Perform the keyway
fitment to the side spur gears as described in instructions,
I glued the shims to the tapered bearing, use glue sparingly.(
this will save you headaches from the shims not staying in place
and getting caught on the axle shoulder). Pack the tapered bearings
with a good quality wheel bearing grease and install both axle
assemblies and tighten the axle nuts. I was only able to fit
1 lock washer as the axles are almost touching and there is
not enough space to fit the second lock washer. I used the Locktite
on the threads and tightened the nuts securely.
Now
remove the small spur gear bolts, but don't let the gear/arbor
assemblies shift. Clean the inside of the case hole with a wax/grease
remover and apply a small amount of sealer to the hole, push
the bolt through and apply sealer on the other hole. Tighten
the bolt using the lock washer and some Locktite. Clean off
any excess sealer and Locktite. The sealer I used is called
: The Right Stuff, from Permatex, available at any auto parts
house. Do this to all 4 bolts.
Clean the differential halves mating surfaces with the wax/grease
remover. Apply a thin layer of sealer, Permatex - 2A (non-hardening),
also available at your local parts house, to the lower case
half, install onto the axle assemblies.(again my floor jack
as my third hand) Center the case half between the axle housings,
push the brass bearing outboard of it respective side. This
will help act as a grease slinger for the inner axle bearings.
Apply a thin layer of sealant on the upper half case on the
radius section only, this is where the brass bearing seats.
Install the case half, and install the cap screws and nuts.
Do Not use Locktite yet. Tighten the 4 cap screws/nuts evenly,
this is to help force out the sealer. Repeat this tightening
sequence several times and clean off any sealer that is squeezed
out. When you feel you can't tighten the bolts any further and
the seams are flush and tight, now one bolt at a time, loosen
the nut and apply Locktite to the threads and retighten. Then
repeat on the next bolt, do not loosen all 4 bolts at the same
time. Install the cog gear using locktite on all the bolts except
the 2 that will be used for filling the differential unit. You
can use the Permatex 2A sealer on these bolts so as not to have
any leaks.
4.0 hours
September 6, 2005
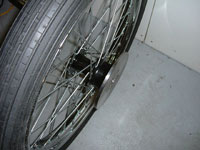
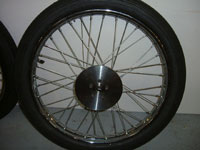
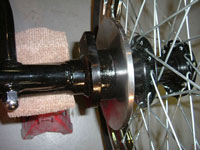
Follow instructions for Kit 4. I had to shorten my keys in order
to fit the grooves in the axle, and had to take about 2mm off
the top half of the key at the bearing, because the key would
interfere with the bearing inner race and not seat properly
into the axle shaft. A little bit of filing on the hub keyways
was necessary in order to have a nice snug fit. I assembled
the balance of the kit without any other fitting. The clearance
of the hub to the axle housing is tight, mine was about .002
inch. There is probably more, but the powder coating takes up
space as well. This will also help keep the dirt out of the
axle bearing. Again, Modelworks machining and attention to detail
is paying off.
2.0 hours
Now
for that well earned brew or two, to admire my handiwork. The
wheels turn smoothly and the differential is working well without
any binding, just one slight tight spot, but this will work
its way out with some use. Also note the wheels will not spin
very freely due to the fact of the freshly packed bearings.
I had some chrome Acorn Nut covers left over from a Ford flathead
engine I just finished, so I put them on the chassis nuts. They
looked real nice against the black chassis.
Now that I've completed the first 4 kits I am quite pleased
with the quality of the parts and the machining, and quite confident
that Modelworks will be providing only the best for our future
installments. The instructions are not written for the novice,
and in a lot of instances the instructions assume the builder
is automotive knowledgeable. Kit 3 was a challenge, which of
course is half the fun. I've fielded a number of calls from
fellow builders on kit 3 and hope I was able to help them. But
please remember this is more than a model, it is an automobile
that will be driven on the streets with other automobiles. Always
think safety first, and when in doubt ask someone who knows.
Modelworks already has a prototype and should be able to answer
any questions through their tech support.
I hope you are enjoying this Locomobile project site. I look
forward to hearing from other builders and how they approach
their project. Yo! Simon, where's the next kit, now I feel like
a fish on the hook.
Rick
Likamobile
Home • Kits
One and Two •
Kits
Three and Four • Kits
Four-B and Five •
Caliper Correction
Kits Six and Eight •
Kit
Seven • Kit
Eight • Kit
Nine •
Kit
Ten • Kit
Ten Addendum • Kit Eleven
Kit Twelve •
Kit
Thirteen • Kit Fourteen
• Kit Fifteen •
Year End • Kit
Sixteen • Leaf
Spring Modification
Kits Seventeen / Eighteen
• Engine
Modification • Boiler
Installation • Burner
Installation
Fuel Line, Brake &
Throttle Pedal Installation • Final
Kit •
Final Assembly & Steam
Up
Road Test & Modifications
• Purge Modification
