I
apologize for taking so long to post my road test results as
I was just having too much fun driving around the neighborhood
and taking in the admiring stares. Also I wanted to collect
as much data as possible with several runs under my belt.
June
2, 2008
All the leaks, described previously, were repaired. Upon trying
to fire up the burner I didn't get any boiler sensors to function
as they had; I removed them to find the brass ends covered with
a type of black tarnish, so I cleaned and reinstalled them.
Everything is now working.
4.0 Hours
June
5
Fired up the boiler to take on the road, only 4 minutes to wait.
Put the reversing lever into the forward notch and the car moved
with the slightest amount of throttle pedal movement. WOW! But
back to the movement at hand, check the brakes to make sure
the car will stop; they work. Now down the drive to the street
and accelerate; WOW! The car accelerated smoothly with the unmistakable
chug of steam emanating from the exhaust; what a very distinctive
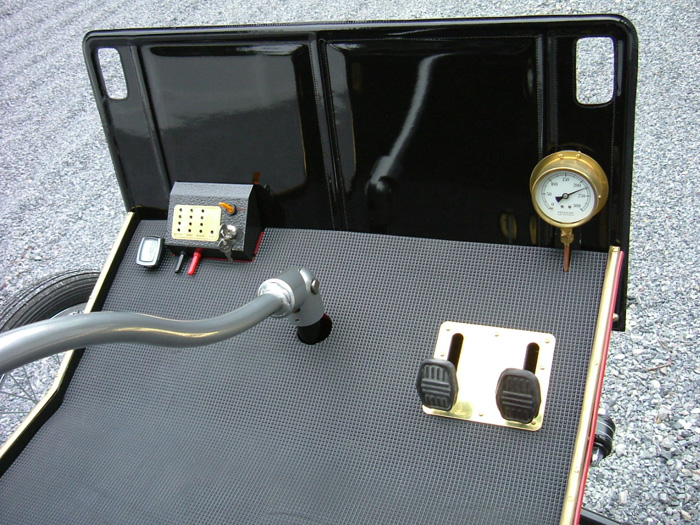
sound. I was watching the pressure gauge to make sure the boiler
cycled as it should, off at 230 psi back on around 175 psi.
Also; watching the boiler lights, I would turn the bypass valve
to bypass when the Blue Led lit (the light is quite bright even
in direct sunlight, so it is easily discernable as to when to
use the bypass valve) and turn the valve to closed when the
Green Led started to flicker. I was becoming more confident
in the operation and now knew what to expect; I was really enjoying
the fruits of my labor.
The engine seemed to run quite well, I did hear an intermittent
knocking noise as the engine catches up to speed; I pulled the
reversing lever back to the first forward notch and the noise
did subside some. I'll have to check to make sure there isn't
anything hitting each other or something coming loose. After
a check everything is tight and nothing appears to be hitting
anything. By pulling back on the lever you are lessening the
amount of steam into the cylinders.
The tiller steering is not as bad as I thought it would be;
just firmly hold onto the tiller and don't try to overcorrect
every time a wheel hits a rut or a groove in the road. Overall
the car tracked straight and turns precisely.
The brakes are quite adequate, but a firm foot pressure is needed
for more abrupt stopping.
After the road test I started to check for any new leaks; None
at this time, but from what I've been told chasing leaks in
a steamer is part of its mystique.
2.0 Hours.
June
10
I've taken the car out several times to make sure I know
what I'm doing and to keep checking on the reliability of the
car. I did adjust the pressure sensor so the burner shuts off
at 250 psi, which has helped when going up slight hills. I noticed
that the engine goes through a lot of steam oil; the reservoir
was almost empty in about 3 miles. I also noticed a sticky wet
floor under the exhaust tubes. I contacted some other builders
and they said the same. I contacted some steam guys and was
told that the vehicle should go through about a ¼ cup
of oil in about 25 miles. I was going through too much.
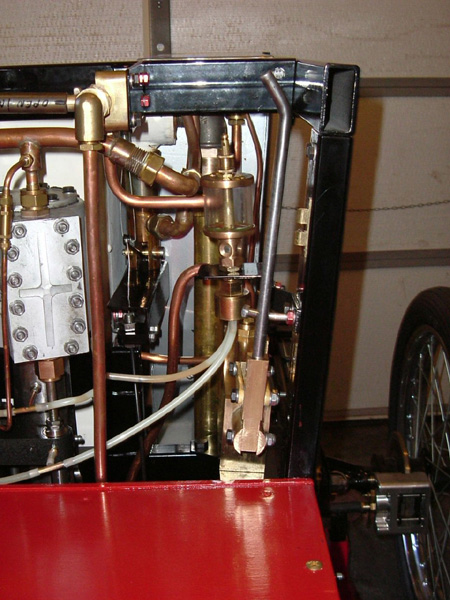
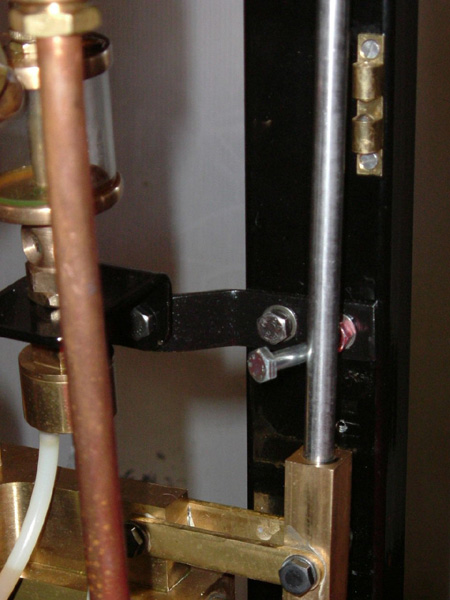
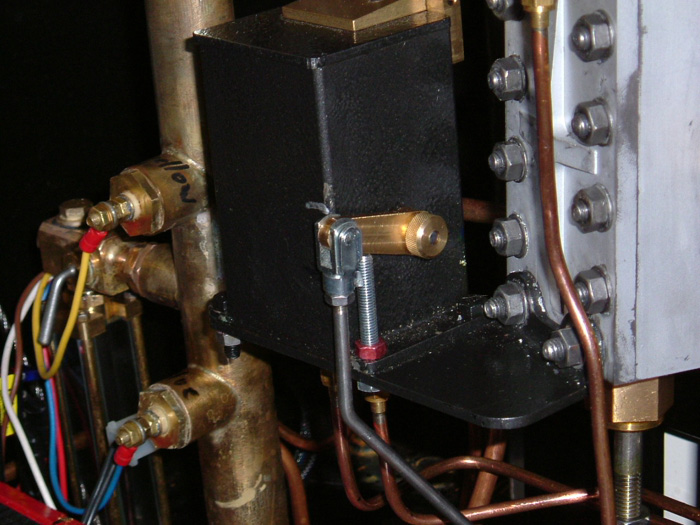
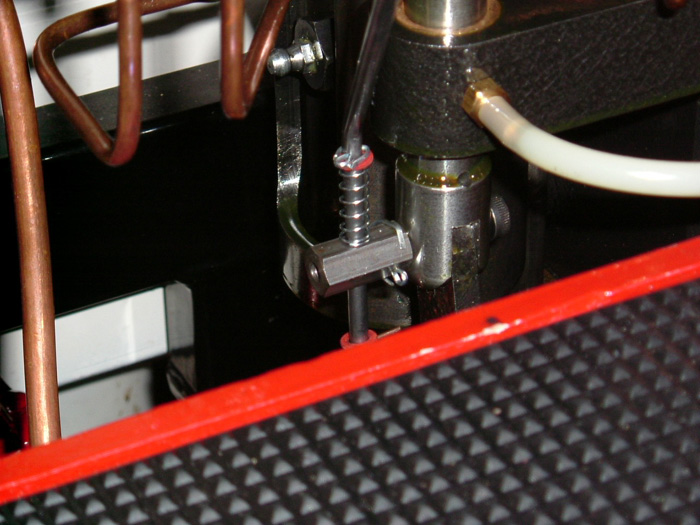
I fabricated a simple device that can control the oil
consumption. I installed a 5mm x 35mm bolt into the front oil
reservoir mount hole under the pump arm. This will control the
downward movement of the arm. I drilled the hole in the valve
link coupler just larger than the pump actuator rod, I drilled
two 1/16 holes in the rod, one near the bend and the other at
the end of the rod. Using a cotter pin on the top hole with
a compression spring I can adjust the upward throw, by shortening
the spring. I used a hairpin clip on the bottom hole with a
small washer to help with the downward throw. Now you can adjust
the pump arm throw, which in turn controls the amount of rotation
of the pump cams. If you look at the pictures you can see I
marked the reservoir with silver marker to show the before amount
of throw, (two longer lines) and the after amount by the top
line and the shorter line near the top. Make sure that the reversing
lever is in the full forward notch and the valve guide at its
full upward position. With the oil pump arm in its most upper
position measure the distance between the upper cotter pin on
the actuator rod and the coupler the rod slides through, this
is the length required for your compression spring.
Rotate the engine so the valve guide is now at its full
downward stroke; check the oil pump arm it should be against
the bolt stop and the coupler against the lower hairpin, if
not shim with washers. Also; drill a 1/16" hole through
the coupler and the valve arm bolt, secure with a cotter pin,
to prevent the bolt from backing out.
I have found that I am now using about 1/2 the reservoir
in 10 miles.
2.0 Hours
June
11
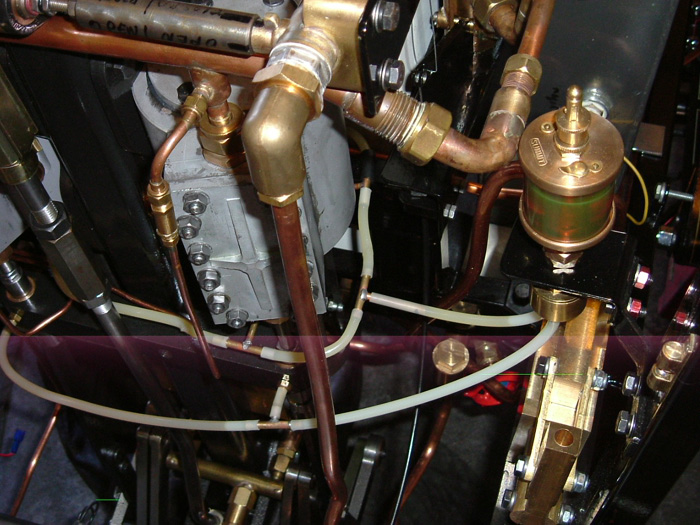
Some builders have reported to get some scoring on the crossheads
and guide tubes, and they have installed oil lines to the existing
tapped holes in the crosshead guides. I made up some brass tees
along with plastic hosing and adapted to my drip oilier. Also
it is not necessary to run with the drip oilier "ON"
all the time. I open my drip oilier as I'm getting the car ready
to steam and after about 5 minutes I turn the oilier to the
"OFF" position. I found that this provides plenty
of oil; I use the Hypoid 85/140 gear oil, as it doesn't have
the tendency to sling off and always leaves a slick coating.
3.0 Hours
June
12
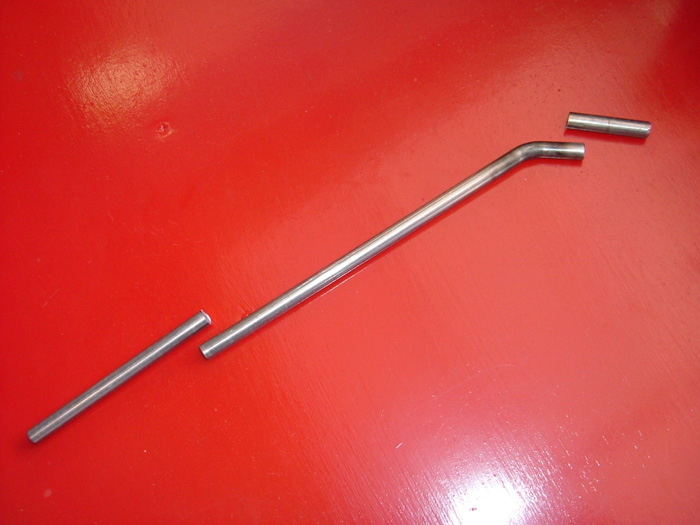
You probably noticed that the hand pump piston has a tendency
to push the engine kick board out as steam pressure builds.
Also; where do I store the hand pump handle?
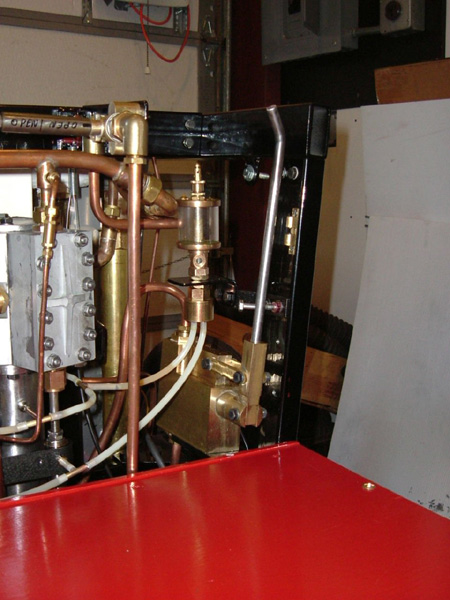
I shortened the pump handle at both ends and bent the
handle another 5 degrees, I replaced the existing drip oilier
bracket bolt with a longer bolt and bent it towards the rear
slightly to allow the pump handle to be vertical. By inserting
the pump handle opposite of normal use the pump piston is now
locked into position and the pump handle is in its stored position,
as it is close enough to the top panel to prevent the handle
from popping out while driving.
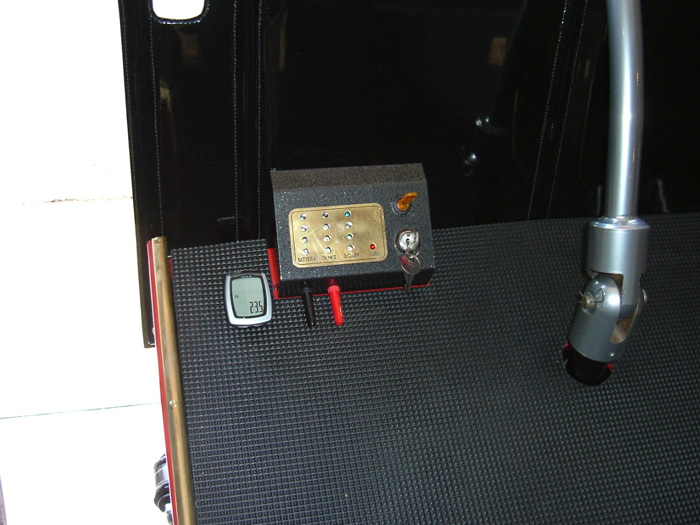
June 29
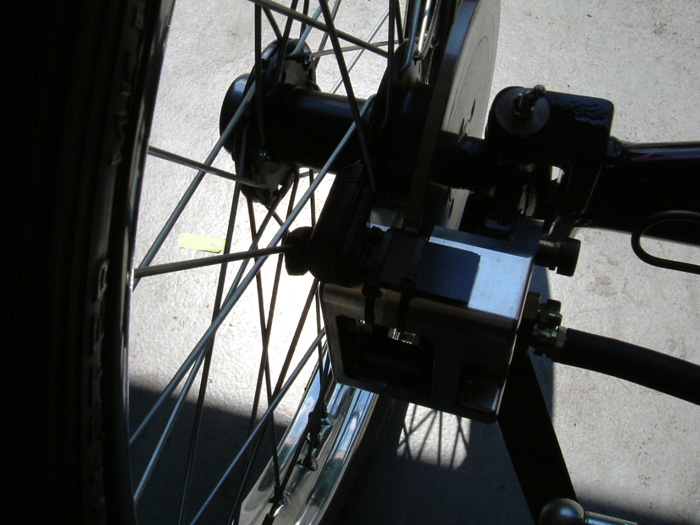
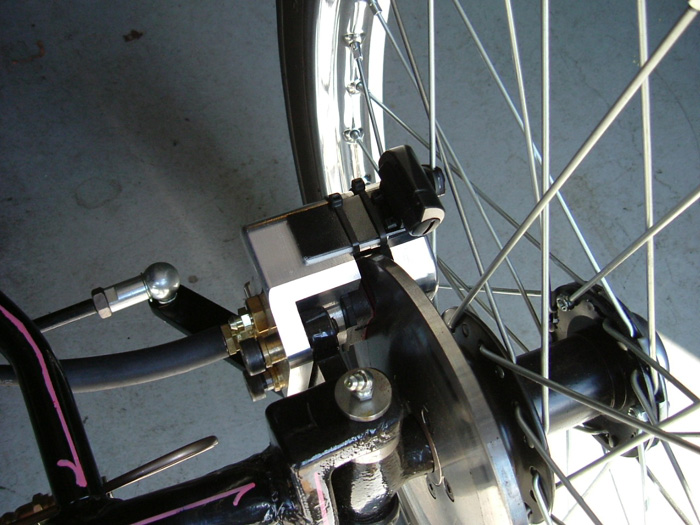
I purchased a wireless bicycle speedometer and installed it
on my car. Now I know that even though it feels like 60 MPH
it really is only on average 20. There is also an odometer and
a clock. Works rather well and is easy to retrofit to the car
and only $54. usd. I have taken it to about 30 miles an hour
on a level surface, but it performs better at the 25 mph area.
2.0 Hours
July
5
At this point I have used the car quite a bit and it
has held up most admirably. I had to keep tightening some of
the fittings, but nothing drastic. I took my wife for a ride
and wouldn't you know it; the steam exhaust pipe came undone
and dragged on the road to make a not so pleasant sound. At
the time I'm thinking my valve linkage is broken and binding
on the chain, my wife is asking; Am I Walking Home? Once I find
the errant pipe, Damn that's Hot. I just put it back onto the
engine and away we go. I find that I get 10 miles to a tank
of water.
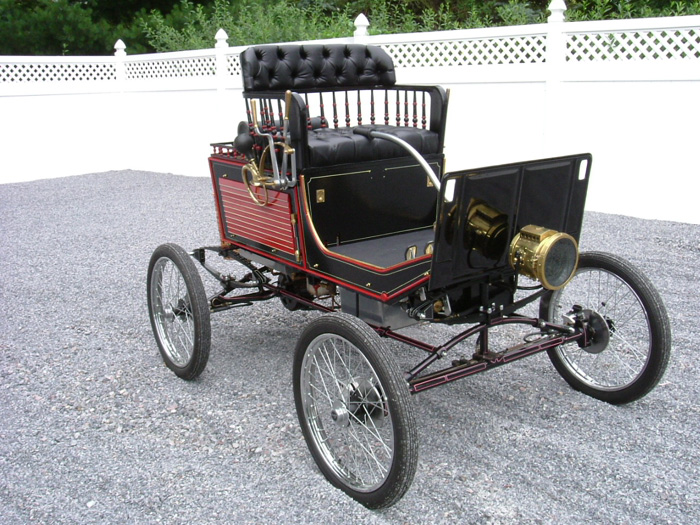
In Conclusion
I have not as yet replaced the rear axles with the new improved
axles from ModelWorks. I have been too occupied with getting
the car steaming and driving. Also; I wanted to get as much
information as possible to those builders who have been following
my build, so they can get steaming as soon as possible. I will
probably perform the axle change over this winter.
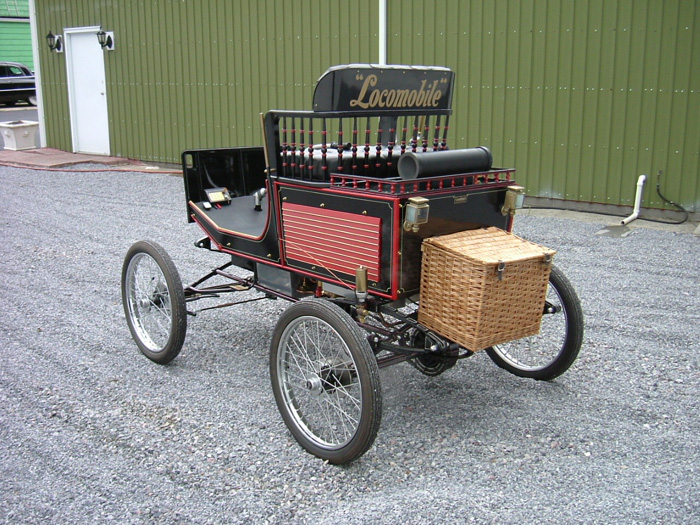
I think there are 6 completed steaming Likamobiles in the world
right now. Some have made a few modifications to help better
enhance the performance, while some others have come up with
reliability modifications. A lot of these modifications have
already been reported. As with all steam cars; they were something
to be tinkered with and improved upon. I urge anyone with an
idea/ modification to post it on the Yahoo Groups - Likamobile
forum so as to share with all the builders.
I will post any other modifications that I have personally
tried and report. For now I plan to just have some fun driving
my Likamobile and showing it off.
This Likamobile project has allowed me to meet and speak with
some wonderful people from around the world; they have shared
their experience or expertise, to which I am grateful. I am
remiss in not keeping closer contact but am no less enthusiastic.
I am more than pleased with the results. Model Works
had made certain claims in the beginning as to the performance
and I believe they made good on their claim. The engineers,
machinists, and all who made the Likamobile possible should
be proud of their accomplishment. I know Model Works is no more,
but I don't believe it wasn't for a lack of trying. So if any
of the engineers and machinists are reading this web site I
want you to know I believe you did a top shelf professional
job.
I wish to thank Jeff Theobold; Editor for the Steam Car Club
of Great Britain and web master of that same site; www.steamcar.net.
Jeff has generously provided the space on his web site for the
last 4 years of the entire Likamobile build. He also publishes
a fantastic club magazine. If you are not a member; I definitely
urge you to join to gain a better understanding of steam and
the hobby.
I will have a video posted in the near future.
Happy
Building
Rick
Click
pictures to enlarge
Likamobile
Home • Kits
One and Two •
Kits
Three and Four • Kits
Four-B and Five •
Caliper Correction
Kits Six and Eight •
Kit
Seven • Kit
Eight • Kit
Nine •
Kit
Ten • Kit
Ten Addendum • Kit Eleven
Kit Twelve •
Kit
Thirteen • Kit Fourteen
• Kit Fifteen •
Year End • Kit
Sixteen • Leaf
Spring Modification
Kits Seventeen / Eighteen
• Engine
Modification • Boiler
Installation • Burner
Installation
Fuel Line, Brake &
Throttle Pedal Installation • Final
Kit • Final Assembly
& Steam Up
Road Test & Modifications
• Purge Modification