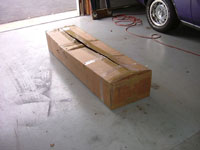
The first installment, kits 1 & 2, arrived on July 7, 2005.
The box was quite abused, opened and retaped shut. My first
thoughts were I'm guaranteed to be missing parts. Upon opening
the box, all the ties to keep the parts from flying were cut,
all the plastic parts bags were opened and all the hardware
was loose and rolling around. I was quite upset and concerned
about missing parts. Obviously, US Customs wanted to make sure
there wasn't any contraband, or components of mass destruction.
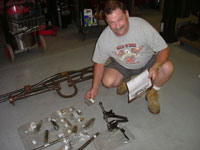
Maybe I should be thankful for their diligence. I started to
inventory all the parts against the parts lists. Nothing was
missing or broke or bent. Now I have a smile on my face and
can't wait to assemble. Here in lies my problem, I'm a hands
on type, and slowing down to take pictures and document everything
is a task for me, but I will do my best for everyone's benefit.
Time: 1 hour
July
8, 2005
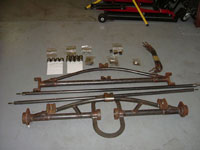
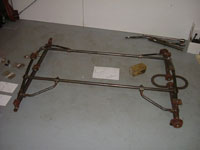
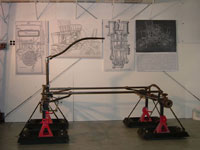
Started trial fit of chassis components. I'm quite impressed
with the quality of the components and the welds are even and
penetrating. During the assembly, I chose to use standard M10
nuts and save the nyloc locknuts supplied for the final assembly.
A drop of light oil (WD 40) on all the threads will help ease
the assembly.
The tube connectors for the rear axle were interfering with
the welds slightly, so I ground the inside of the connectors
for clearance instead of grinding away at the welds, the welds
were too nice to degrade.
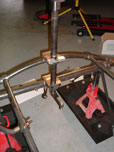
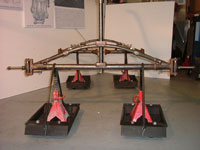
Upon tightening the chassis nuts the long chassis runner tubes
were bowing quite a bit, almost 1 ¼ inches. Upon relieving
the tension on the stay nuts the chassis runner tubes straightened
out. There was an average of ½ inch clearance between
the stays and the axle housing boss, front and rear. I showed
my friend Gil this problem and he agreed this doesn't seem correct.
I sent off an e-mail to Steve in tech support with some pictures,
asking if this is an engineered bow.
Steve did get back to me a few days later, stating that the
stays were manufactured incorrectly, too short, and that there
should only be about ¼ inch clearance. He said the new
stays would be shipped with my Kit 3. I left the stays loose
so as not to have a permanent bend in the chassis runners.
Time: 2 hours
July
10, 2005
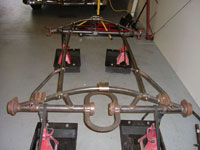
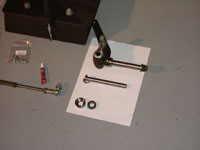
I set the chassis on jack stands w/ dolly wheels, so
I could push the chassis out of the way when not working on
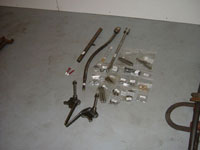
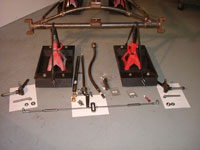
the car. I layed out the components for Kit 2 and familiarized
myself with where everything is supposed to go.
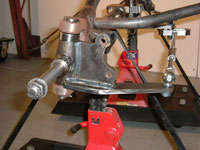
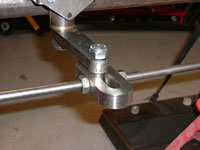
The king pins had a lot of metal shavings in the holes, wash
and blow these holes clean with air pressure. Trial fit the
pins to the front axle and the spindle; mine required just a
little polishing and then slide into place with a little effort.
I used just a little oil to help things along, I then fit the
spindle bearings and the washer and cotter key, I only used
oil at this time because I knew I was going to completely dismantle
the entire chassis and its components for powder coating later
on. The steering shaft required a slight burnishing of the end
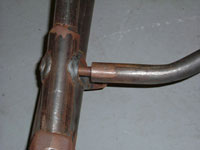
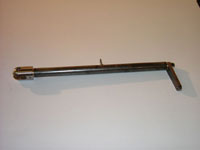
so as not to score the brass bushings.
When I determined which end would be the top of the steering
tube I drilled a small hole (1/8 inch) in the side of the tube
and the brass bushing near the top of each bushing for future
lubrication. Also, I filed the edges on the steering tube caps
slightly as they are knife sharp. This will aid in ease of cap
alignment around the steering tube as well as help with paint
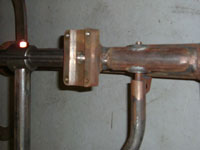
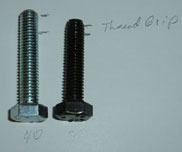
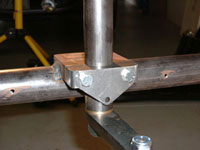
adhesion later on. Regarding the steering tube lower tube clamp,
I found that the 8 X 35 hex bolts provided are a little short,
as there were only 3 threads holding this clamp. I replaced
these bolts with 8 X 40 bolts for more thread retention.
Time: 3 hours
Other than those items I have addressed the parts and components
are of high quality and the machining is right on.
Now that I have assembled the first 2 kits, the wait
was worth it, Modelworks is producing a high quality kit and
everyone involved should be quite proud. Keep up the good work.
Hopefully the next installment will arrive as scheduled
without a lot of the Customs red tape. Looking forward to the
next Kits. All I can do now is sit back with a cold beer and
admire the fruits of my labor.
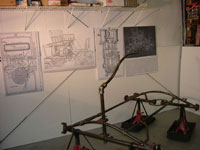
The fellow with the white beard is my friend Gil Harris,
He's a boiler engineer with the Pine Creek Railroad, Allaire,
NJ. This is one of the oldest continuous running steam railroads
in the USA. He's my steam "go to guy".
Rick
| KIT
TWO |
|
|
|
 |
|
|
|
|
|
|
|
|
|
|
|
|
Likamobile
Home • Kits
One and Two •
Kits
Three and Four • Kits
Four-B and Five •
Caliper Correction
Kits Six and Eight •
Kit
Seven • Kit
Eight • Kit
Nine •
Kit
Ten • Kit
Ten Addendum • Kit Eleven
Kit Twelve •
Kit
Thirteen • Kit Fourteen
• Kit Fifteen •
Year End • Kit
Sixteen • Leaf
Spring Modification
Kits Seventeen / Eighteen
• Engine
Modification • Boiler
Installation • Burner
Installation
Fuel Line, Brake &
Throttle Pedal Installation • Final
Kit • Final Assembly
& Steam Up
Road Test & Modifications
• Purge Modification