April
8, 2006
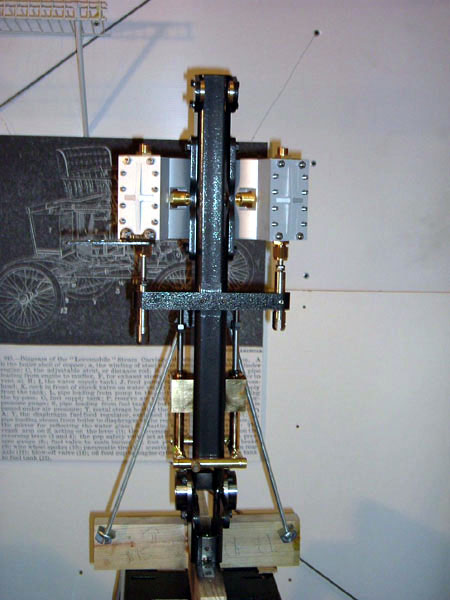
I
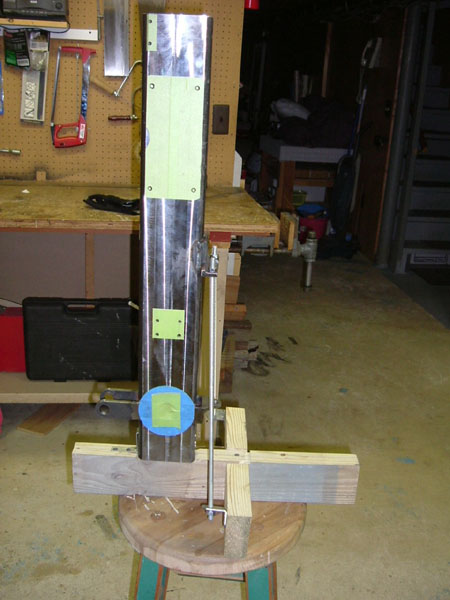
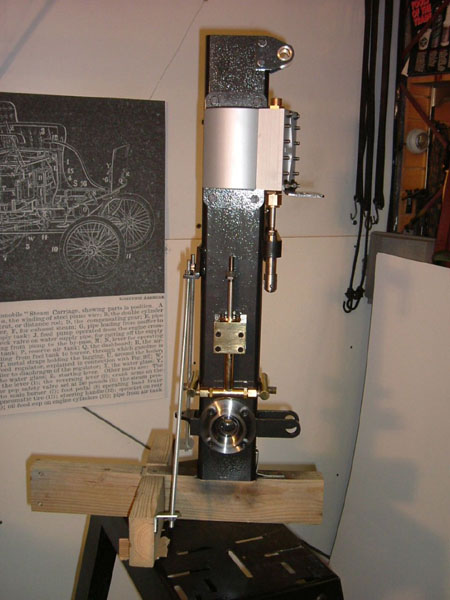
made an engine stand to make assembly a little easier and to
view operation of the components. I used 2 pieces of wood, crossed,
and some threaded rod to secure the engine to the stand.
1.5 hours
April
16
I had to slightly grind the welds where the tabs are welded
to the engine beam so the crankshaft bearing flanges would sit
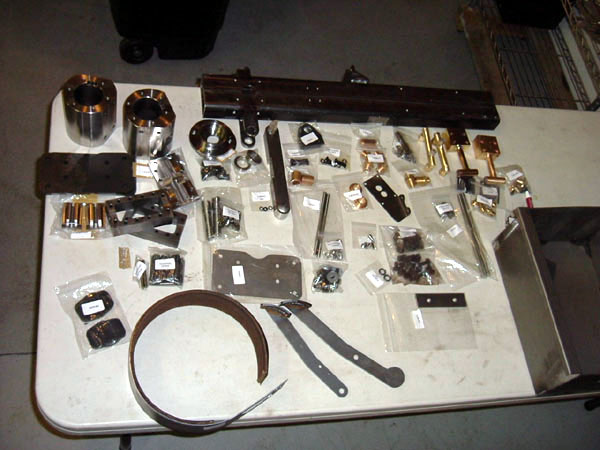
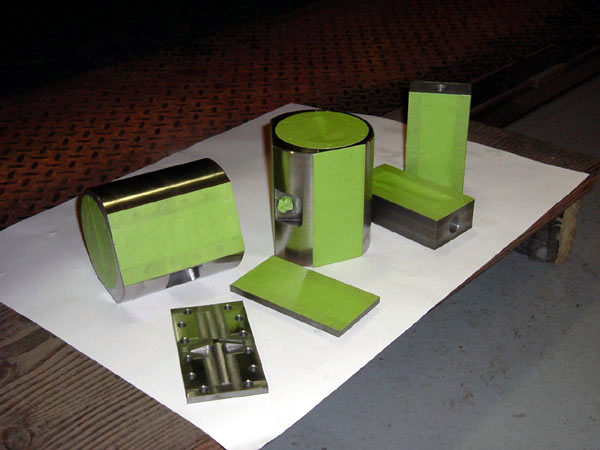
flush to the beam. Pressed in all the brass bushings. Since
I am painting the beam and the cylinders I taped off all the
area's that would be in contact with the beam, steam chest,
water pumps, and valve guide. Since these are machined I did
not want any paint interference. I used a Hammer Tone Black
for the beam and Barbecue Silver (high heat) for the cylinders
and the steam boxes. I polished the brass water pumps and manifolds.
4.0 hours
April
17
I started cylinder assembly. The cylinders and steam boxes and
valves bolted together without any problems. The valve guides
and threaded rod needed to be thoroughly cleaned of filings
and a 1.25 X 8 tap run through to clean up the threads. The
valve rods will have to be rethreaded as the threads are not
cut deep enough to thread into the valve guide, a 1.25 X 8 die
takes care of this problem easily. I was contacted by Gil and
Brad; they were having this problem as well, so I will assume
others will run across this.
3.0 hours
April
23
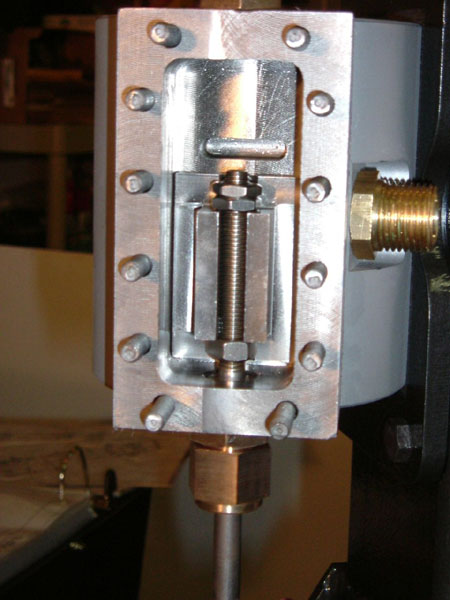
I set the valve guide bar and guides and started to make my
adjustments for smooth operation of the valves. I had to remove
1 cylinder shim to obtain smooth valve operation. As all the
bolts are tightened keep checking the valve operation, after
all the bolts are tightened and you are satisfied with the valve
motion, remove the cylinder plate bolts one at a time to put
Locktite on the threads and do the same with the valve guide
bar bolts. All other bolts are only temporarily assembled.
1.5 hours
April
24
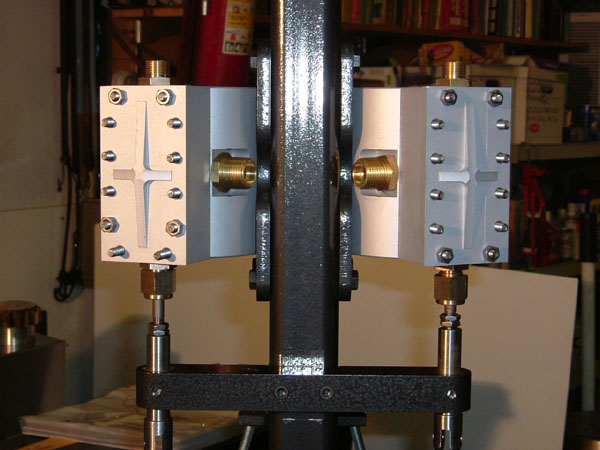
Start water pump assembly. I had to pass a .2610 drill through
the 4 fittings and the pump bodies where the valves are to be
assembled. The 4 valves needed quite a bit of cleaning as there
were a lot of burrs from the machine work. When the valves are
assembled properly you should be able to blow air through them
in only 1 direction. Make sure that the valves are installed
so that the inlet and outlet are on the same end of the engine
beam as the pumps are a mirror image of one another. I had to
remove 1 shim so the manifolds would not bind when securing
the fittings. Use Teflon Tape on the threads of the fittings
into the water pumps and tighten securely. All other bolts and
the manifold fittings are just snug at this point, as this is
only temporary assembly.
3.0 hours
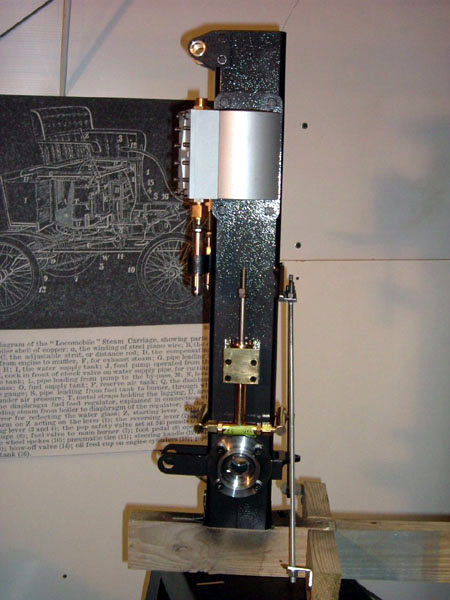
The machine work on the cylinders and the steam boxes
is absolutely outstanding, a work of art. I found the machine
work on the water pumps quite rough in comparison to all the
other machine work received. This little steam engine is really
looking good. In comparison to the real Locomobile I believe
the cylinder size is the same, although different in engineering
approach. I'm now quite anxious for the next kit which should
complete the engine and install in the chassis. Time for another
Guinness and admire my work.
Happy Building
Rick
Click
pictures to enlarge
Likamobile
Home • Kits
One and Two •
Kits
Three and Four • Kits
Four-B and Five •
Caliper Correction
Kits Six and Eight •
Kit
Seven • Kit
Eight • Kit
Nine •
Kit
Ten • Kit
Ten Addendum • Kit Eleven
Kit Twelve •
Kit
Thirteen • Kit Fourteen
• Kit Fifteen •
Year End • Kit
Sixteen • Leaf
Spring Modification
Kits Seventeen / Eighteen
• Engine
Modification • Boiler
Installation • Burner
Installation
Fuel Line, Brake &
Throttle Pedal Installation • Final
Kit • Final Assembly
& Steam Up
Road Test & Modifications
• Purge Modification